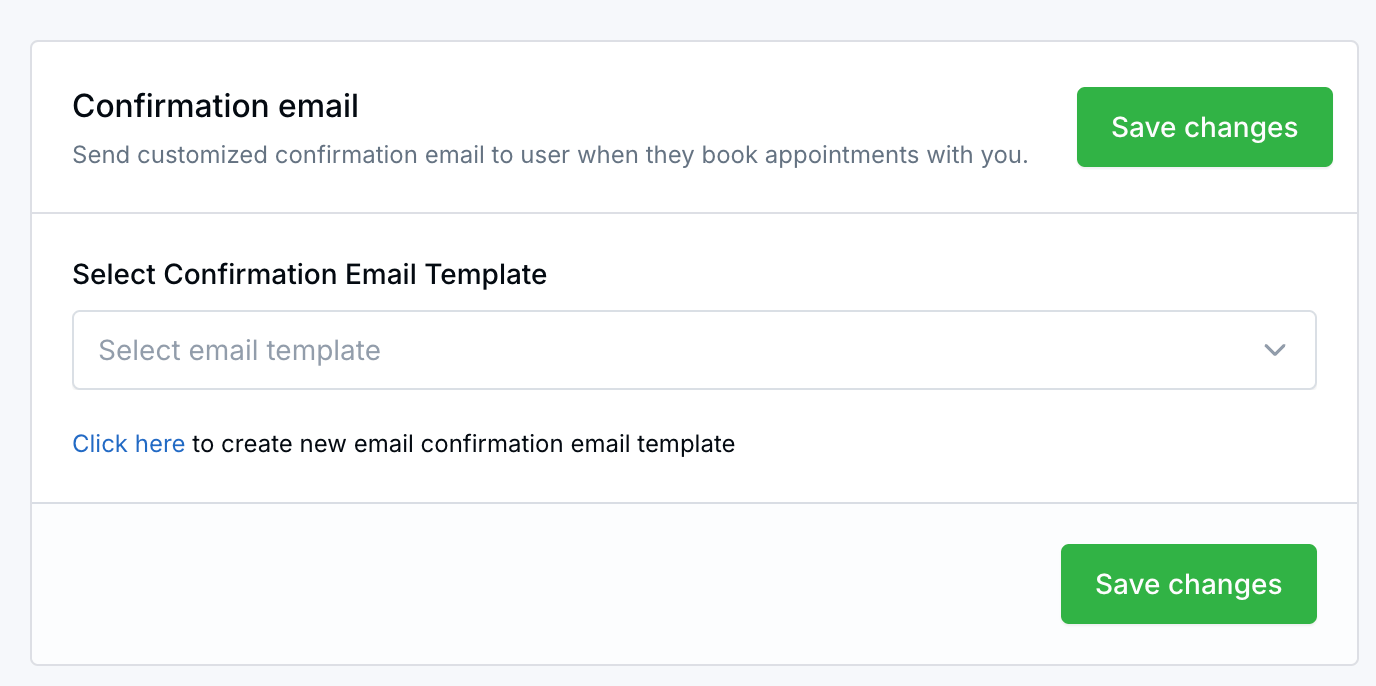
Use Zoom within your LeadCenter Meetings
LeadCenter offers seamless integration with the Zoom video conferencing platform. Once connected, the system automatically generates video conferencing details when someone books a call with you. You and your invitee will receive details via a confirmation email and calendar event. If you enable Zoom Meeting Summary AI Companion, notes and tasks will automatically be generated and added to the contact notes and related tasks.
* Meeting Summary and Tasks are generated for Appointments with Clients, not Internal Meetings.
Note: If you have your Zoom account already connected in LeadCenter before the latest App update, you will need to disconnect your Zoom account and connect it again for Zoom Meeting Summary AI Companion integration to work
To connect your Zoom account, follow the steps given below:
Alternatively, use this link (https://app.leadcenter.ai/dashboard/zoom) to directly access the Zoom Integration page.
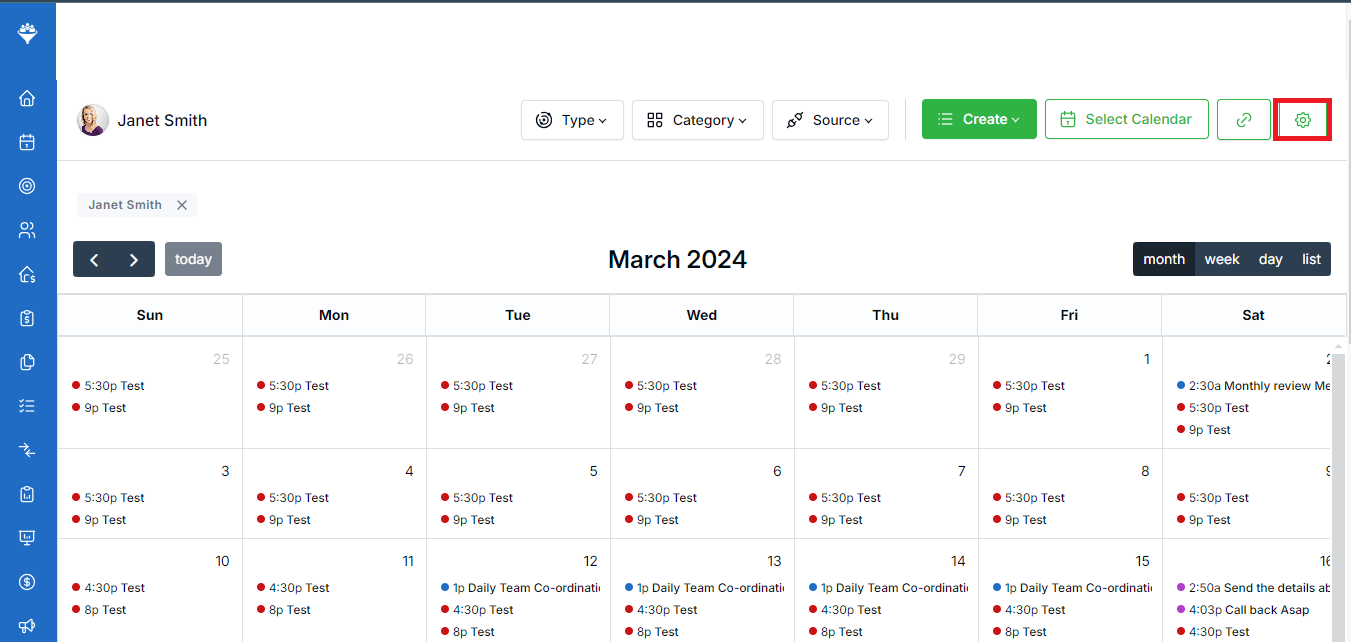
3. Click on the gear icon located in the top right corner to access the Settings menu.
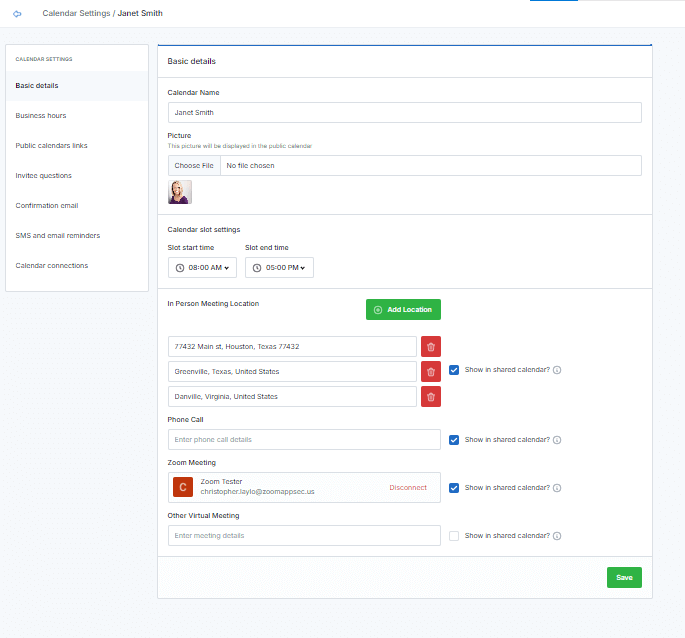
4. In the Basic details section, scroll down and click on Connect your Zoom account button.

5. After signing in to your Zoom account, click the Allow button at the bottom.

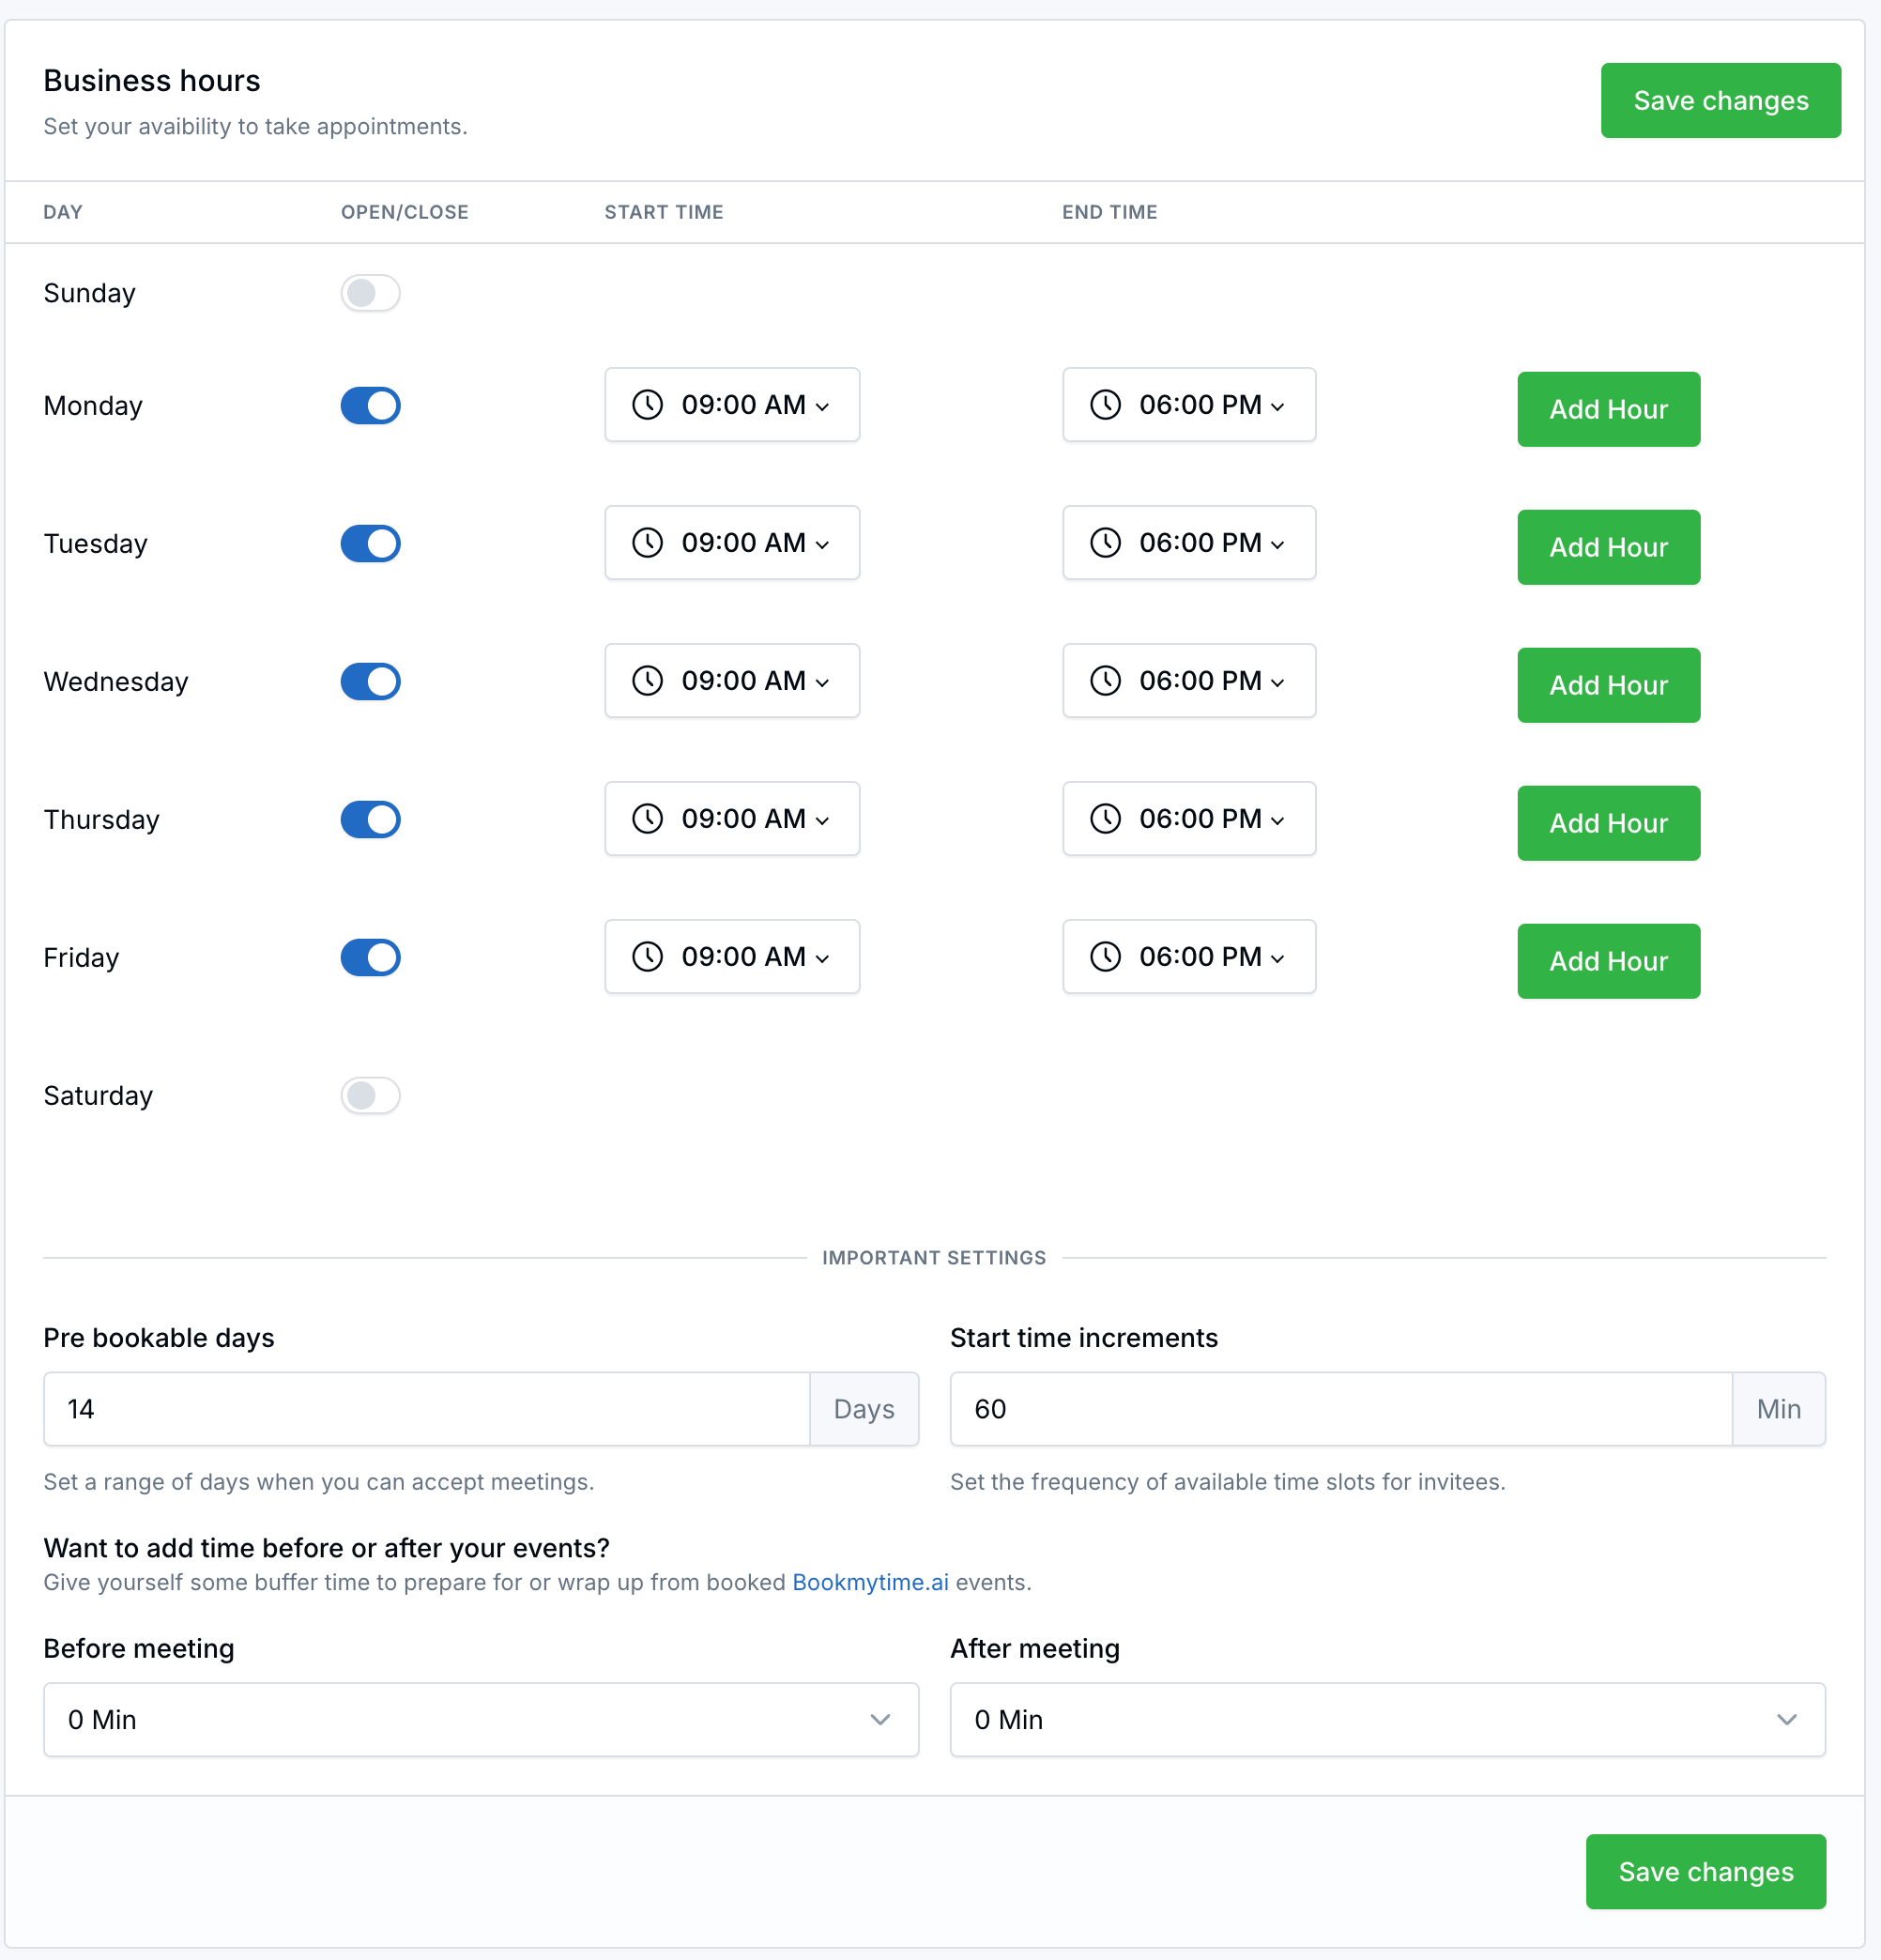
6. You’ll be redirected to the Calendar Settings page.
7. Click on the radio button next to Enable Zoom Meeting Summary AI Companion. If you enable this feature, Zoom Meeting Summary will be inserted in LeadCenter as a note and linked to the appointment.
8. Click on the radio button next to Enable Creating Tasks from Zoom Meeting Summary AI Companion. If you enable this feature, Tasks will be created in LeadCenter from Zoom Meeting Summary and assigned to you.
9. Save these changes by clicking on the Save button.

Here is an example how the meeting summary and tasks that will be captured from Zoom Meeting Summary AI Companion.*

1. In your calendar, click to create an appointment with contact.
2. Under Meeting Type, select Zoom Meeting.

3. Click Create Appointment.
After your create the appointment, you and your invitee will receive Zoom details via confirmation email and calendar invite. The meeting will also show in your Zoom account under Upcoming Meetings.
Your clients will be able to book a Zoom meeting from your public scheduler page, you and your invitee will receive Zoom details via confirmation email and calendar event. The meeting will also show in your Zoom account under Upcoming Meetings.

After the meeting is concluded, Zoom Meeting Summary AI Companion will generate a summary of the meeting and a list of tasks. LeadCenter will capture Call Summary as notes and add the tasks to the appointments main host. Notes and Tasks can be viewed from:
1- The appointment page. Open your calendar in LeadCenter and open the appointment, you will see the notes and tasks to the right side like this:
2- Notes page https://app.leadcenter.ai/dashboard/notes
3- Tasks page https://app.leadcenter.ai/dashboard/tasks
To disconnect your Zoom account, go to Calendar Settings. In the basic details page, click on the disconnect link.

LeadCenter.AI allows users to manage their appointments and calendars. It helps you manage the working hours & calendar time of your employee.
To manage a task, do the following;


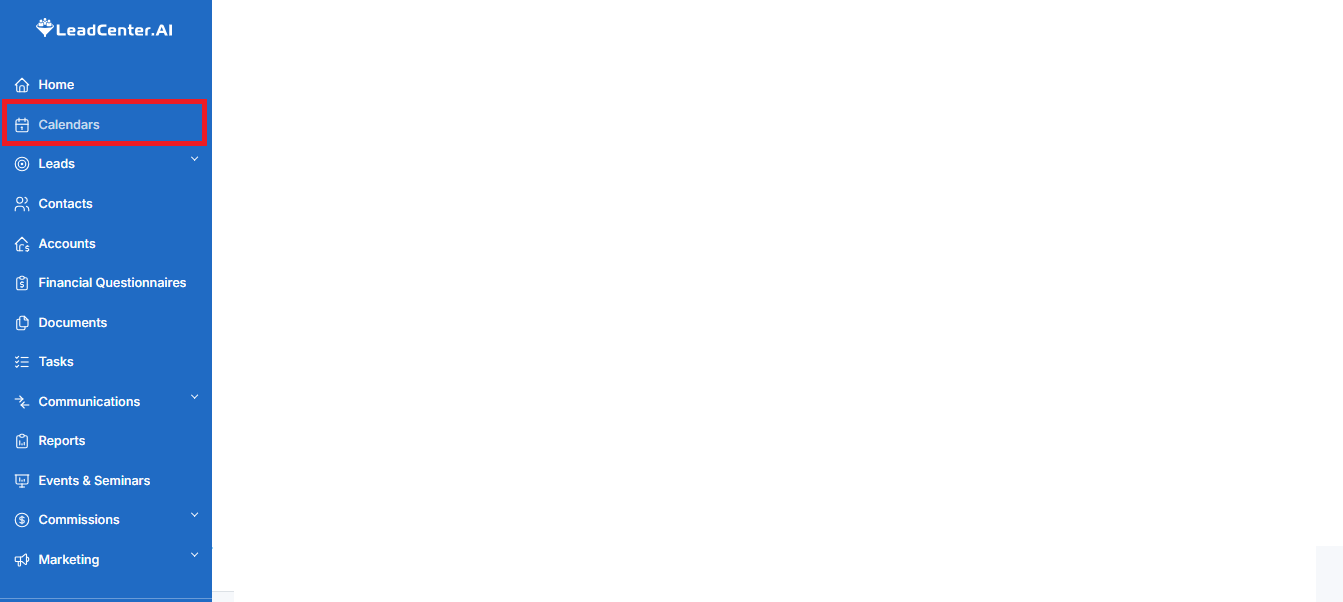
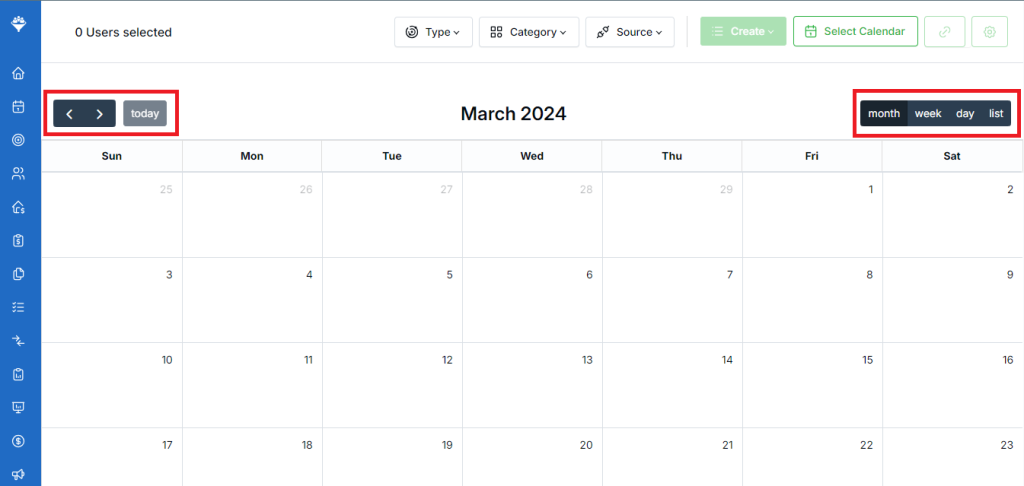
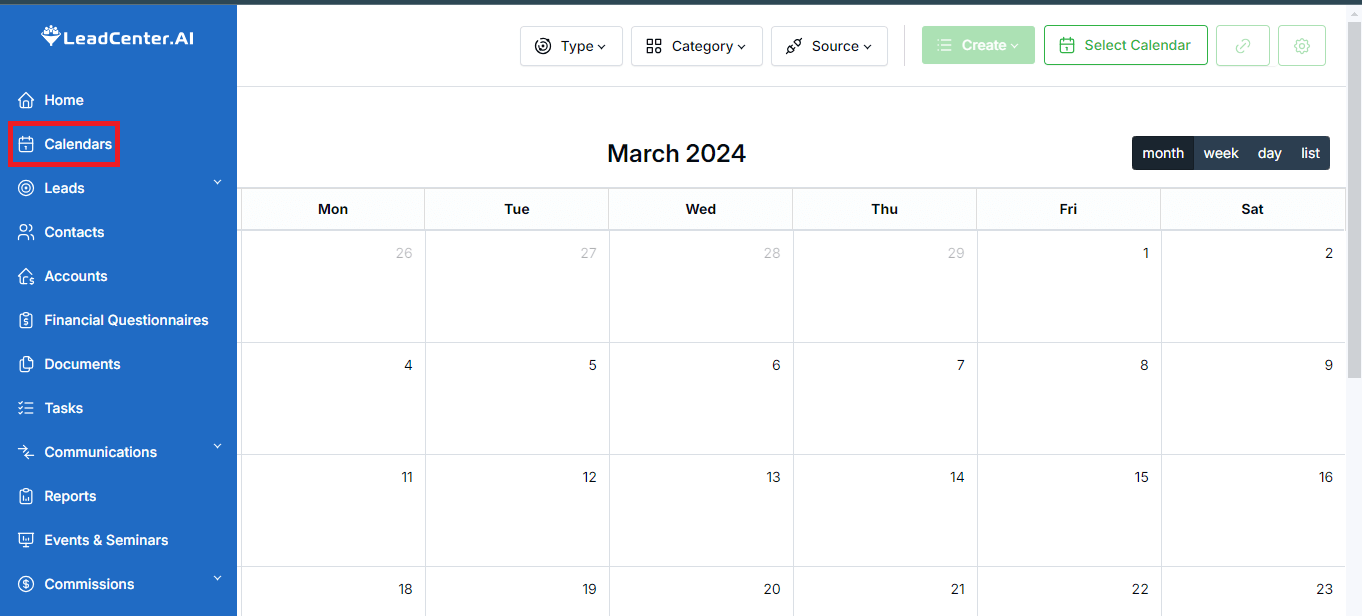
The Calendars section in LeadCenter helps you track your schedule and streamline your meetings and appointments.
It helps you
Let’s explore this further.
To schedule, click on the forward and backward arrows to move to the next day or the previous day. The available views are:
To create appointments, follow these steps:

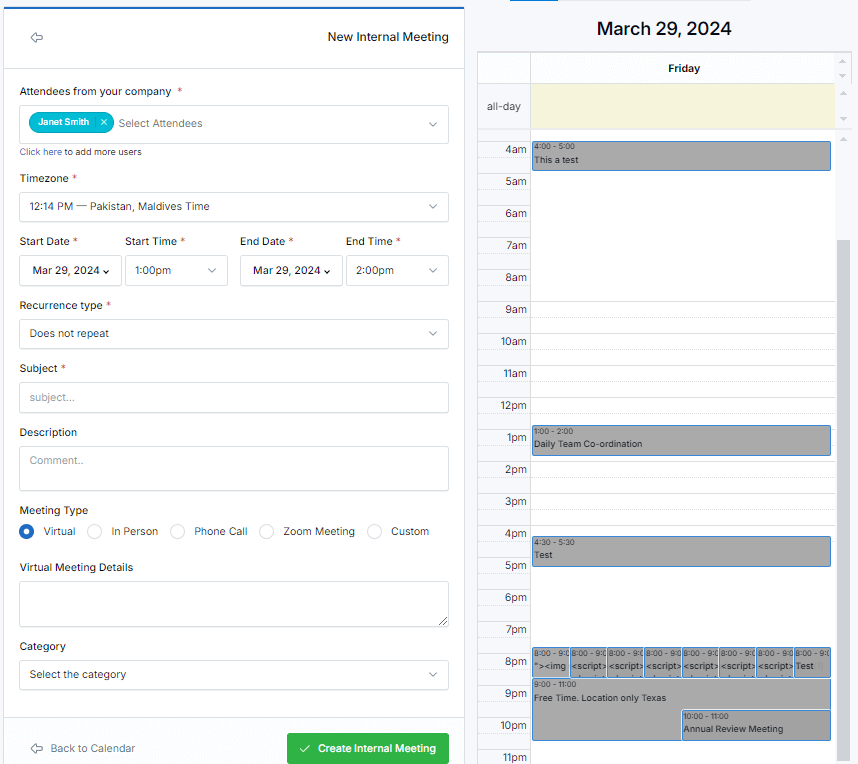
Refer to the table below for some common fields with description:
| Fields | Description |
| Attendees | Select Attendees from the drop-down list. |
| Customer Name | Enter the customer's name. |
| Customer Email | Enter the customer email ID. |
| Timezone | From the drop-down timezone list, select the required time based on the preferred time. |
| Customer Phone | Enter the customer's phone number from the drop-down list. |
| Company Name | Enter the customer's company name. |
| Start Date, Start Time, End Date, and End Time | Pick your start date, start time, end date, and end time in an hour-and-minute format and click Apply. |
| Recurrence type | Click on this drop-down to select the frequency of this meeting. |
| Subject | Enter the subject for the appointment for example “Demo meeting with Lead“. |
| Description | Enter the description for the appointment for example “Discussion about the Website“ |
| Meeting Type | Select the meeting type by clicking on the radio button. |
| Location or Virtual Meeting Link | Enter the Location or Virtual Meeting Link. |
| Importance | Select the Importance from the drop-down list. Low, Medium, and High. |
| Priority | Select the priority from the drop-down list. 1, 2,3, 4, 5, and 6. |
| Meeting Details | Write down any details regarding the meeting. |
| Category | Select the meeting category by clicking on the Category drop-down. |
To edit an appointment, follow these steps:
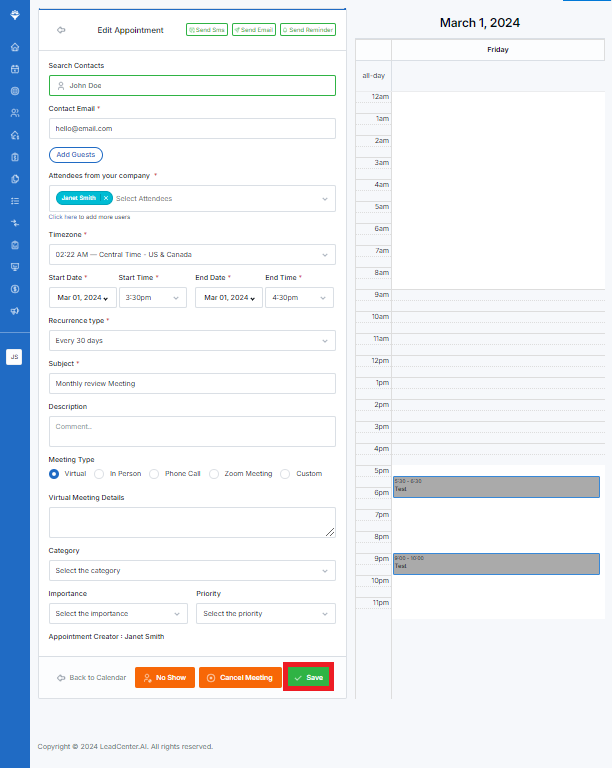
On top, you’ll see three buttons. You can use them to:

At the bottom, you’ll see two buttons next to the Save button:

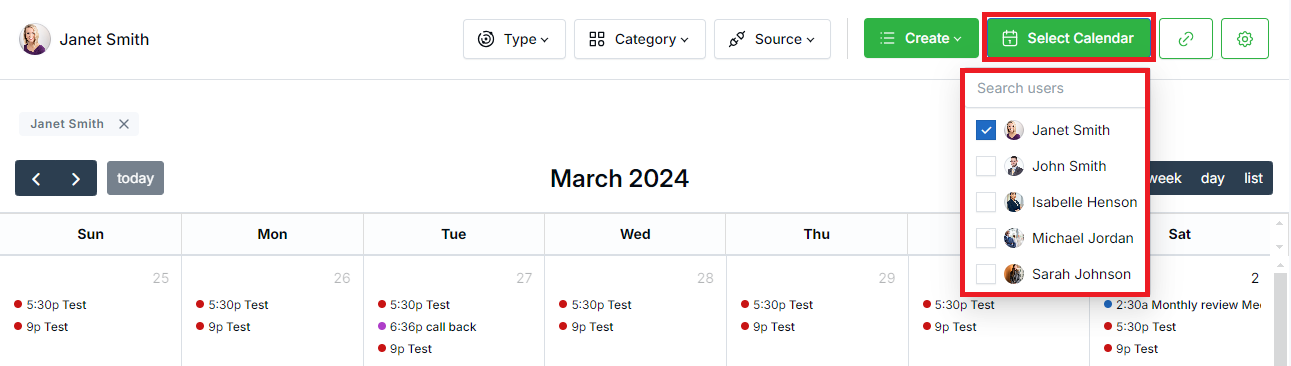
You have the option to view the calendars of your colleagues or employees. Follow these steps to do so:

You can edit employee calendars. To do this, follow these steps:
Navigating Calendars
To navigate Calendars with ease and to use it to its full extent, use the three drop-down filters on top. These filters are:
Type: Use this drop-down to check the required appointment type. For example, confirmed, no show, or cancelled.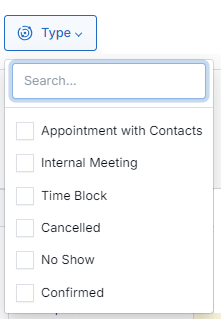
Category: Use this drop-down to select the required category, For example, first appointment, customer support, etc.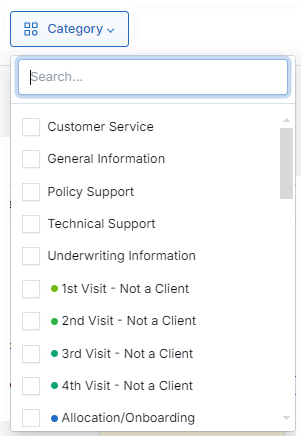
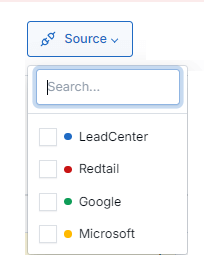
Source: Use this drop-down to see the source calendar.